
mac安装redis并集成到springboot项目中
使用Homebrew安装Redis
1、没有安装Homebrew,首先安装npm国内的吧,快一些。 打开终端输入以下命令:
/bin/zsh -c "$(curl -fsSL https://gitee.com/cunkai/HomebrewCN/raw/master/Homebrew.sh)"2、使用Homebrew安装命令
brew install redis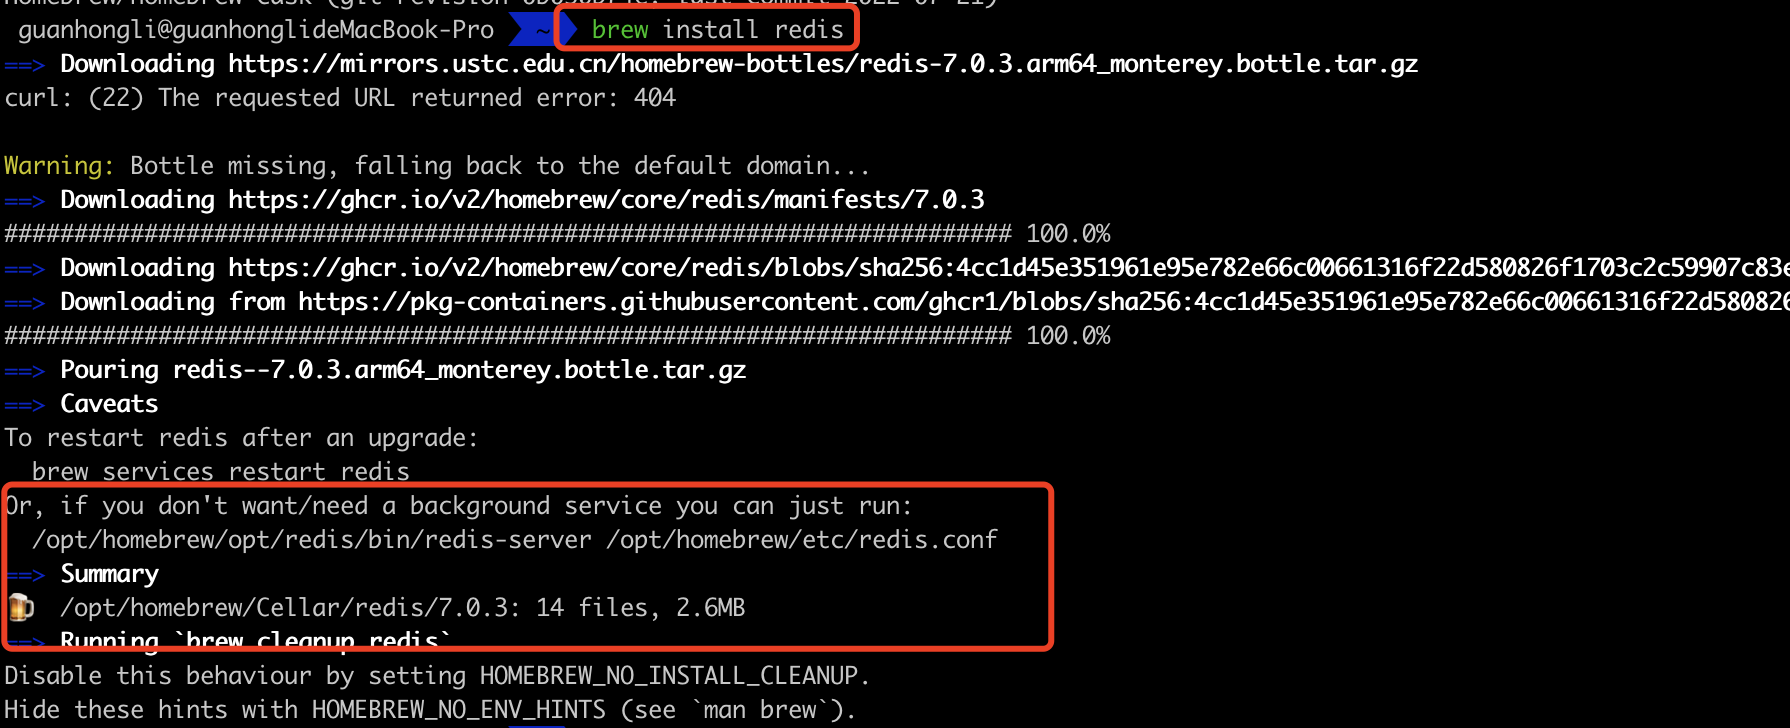
3、 查看安装及配置文件位置
- Homebrew安装的软件会默认在
/opt/homebrew/Cellar/redis/7.0.3路径下 - redis的配置文件
redis.conf存放在/opt/homebrew/etc/redis.conf路径下
4、启动redis服务
//方式一:使用brew帮助我们启动软件
brew services start redis
//方式二
redis-server /usr/local/etc/redis.conf

//执行以下命令
redis-server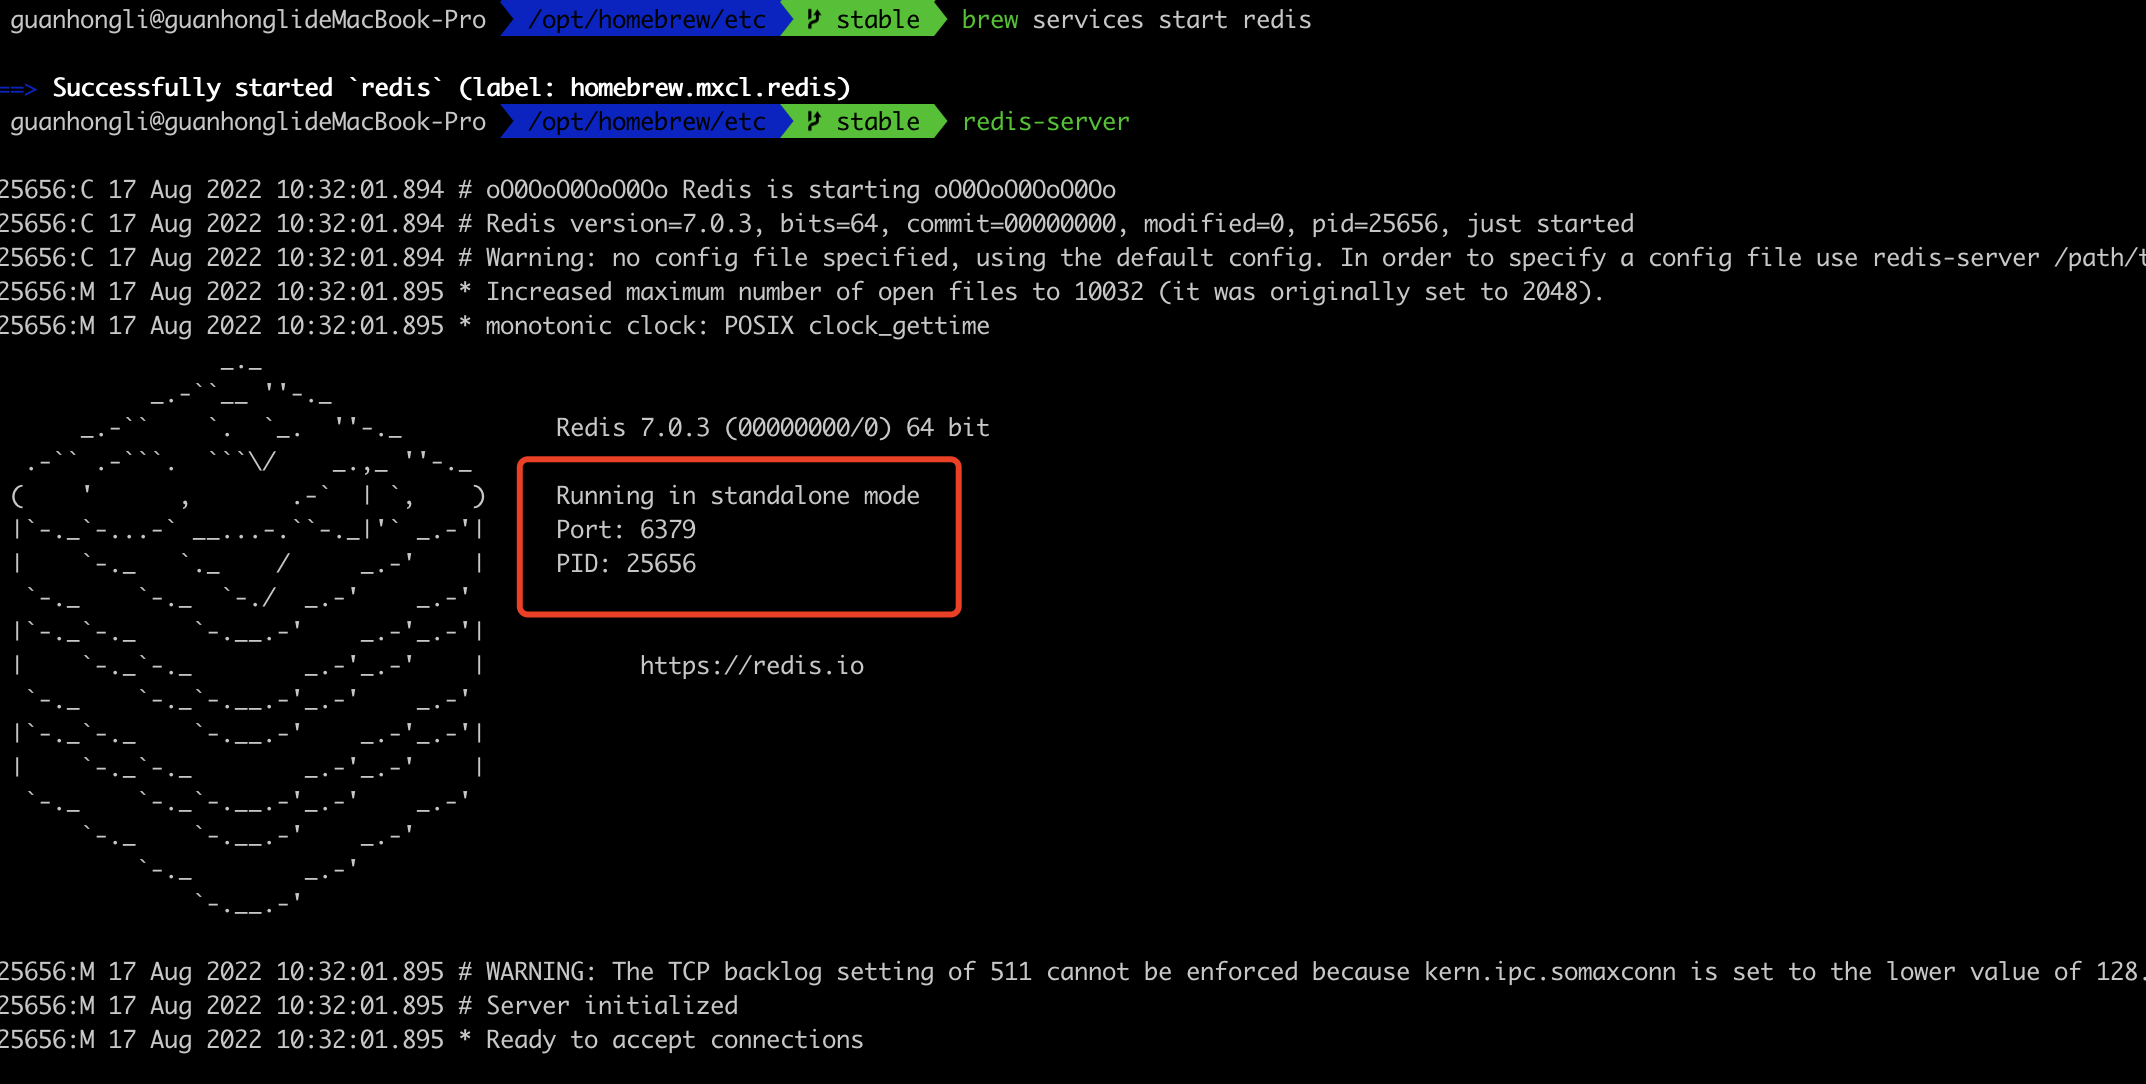
5、查看redis服务进程
我们可以通过下面命令查看redis是否正在运行
ps axu | grep redis6、redis-cli连接redis服务
redis默认端口号6379,默认auth为空,输入以下命令即可连接
redis-cli -h 127.0.0.1 -p 63797、启动 redis 客户端,打开终端并输入命令 redis-cli。该命令会连接本地的 redis 服务。
$redis-cli
redis 127.0.0.1:6379>
redis 127.0.0.1:6379> PING
PONG
8、关闭redis服务
- 正确停止Redis的方式应该是向Redis发送SHUTDOWN命令
redis-cli shutdown- 强行终止redis
sudo pkill redis-server9、设置密码
打开配置文件redis.conf在requirepass foobared注释下添加密码。
# IMPORTANT NOTE: starting with Redis 6 "requirepass" is just a compatibility
# layer on top of the new ACL system. The option effect will be just setting
# the password for the default user. Clients will still authenticate using
# AUTH <password> as usually, or more explicitly with AUTH default <password>
# if they follow the new protocol: both will work.
#
# The requirepass is not compatible with aclfile option and the ACL LOAD
# command, these will cause requirepass to be ignored.
#
# requirepass foobared
requuirepass 123456
redis.conf 配置文件详解
redis默认是前台启动,如果我们想以守护进程的方式运行(后台运行),可以在redis.conf中将daemonize no,修改成yes即可。
- bind
- 默认情况
bind=127.0.0.1只能接受本机的访问请求 - 不写的情况下,无限制接受任何ip地址的访问
- 生产环境肯定要写你应用服务器的地址;服务器是需要远程访问的,所以需要将其注释掉
- 默认情况
- Port
- 端口号,默认 6379
集成springboot
1、依赖导入
Spring Boot 集成 redis 很方便,只需要导入一个 redis 的 starter 依赖即可。如下:
<dependency>
	<groupId>org.springframework.boot</groupId>
	<artifactId>spring-boot-starter-data-redis</artifactId>
</dependency>
<!--阿里巴巴fastjson -->
<dependency>
	<groupId>com.alibaba</groupId>
	<artifactId>fastjson</artifactId>
	<version>1.2.35</version>
</dependency>
这里也导入阿里巴巴的 fastjson 是为了在后面我们要存一个实体,为了方便把实体转换成 json 字符串存进去。
2、Redis 配置
导入了依赖之后,我们在 application.yml 文件里配置 redis:
server:
	port: 8080
spring:
	#redis相关配置
	redis:
	database: 5
	# 配置redis的主机地址,需要修改成自己的
	host: 127.0.0.1
	port: 6379
	password: 123456
	timeout: 5000
	jedis:
		pool:
		# 连接池中的最大空闲连接,默认值也是8。
		max-idle: 500
		# 连接池中的最小空闲连接,默认值也是0。
		min-idle: 50
		# 如果赋值为-1,则表示不限制;如果pool已经分配了maxActive个jedis实例,则此时pool的状态为exhausted(耗尽)
		max-active: 1000
		# 等待可用连接的最大时间,单位毫秒,默认值为-1,表示永不超时。如果超过等待时间,则直接抛出JedisConnectionException
		max-wait: 2000
3、redisController.java
package com.example.demo_jdbc.controller;

import org.springframework.beans.factory.annotation.Autowired;
import org.springframework.data.redis.core.RedisTemplate;
import org.springframework.web.bind.annotation.*;
import org.springframework.web.client.RestTemplate;

/**
 * @version 1.0
 * @auther guanhongli
 * @date 2022/8/17 4:04 PM
 */
@RestController
public class RedisController {
    @Autowired(required = false)
    private RedisTemplate redisTemplate;

    @GetMapping("/redis/get/{key}")
    public Object get(@PathVariable("key") String key) {
        return redisTemplate.opsForValue().get(key);
    }

    @PostMapping("/redis/set/{key}/{value}")
    public Object set(@PathVariable("key") String key, @PathVariable("value") String value) {
        redisTemplate.opsForValue().set(key, value);
        return "set success";
    }

    @GetMapping("/redis/del/{key}")
    public Object del(@PathVariable("key") String key) {
        redisTemplate.delete(key);
        return "del success";
    }

    @PostMapping("/redis/getAndSet/{key}/{value}")
    public Object getAndSet(@PathVariable("key") String key, @PathVariable("value") String value) {
        redisTemplate.opsForValue().getAndSet(key, value);
        return "getAndSet success";

    }
}
redisConfig.java
package com.example.demo_jdbc.config;

import org.springframework.cache.annotation.CachingConfigurerSupport;
import org.springframework.context.annotation.Bean;
import org.springframework.context.annotation.Configuration;
import org.springframework.data.redis.connection.RedisConnectionFactory;
import org.springframework.data.redis.core.RedisTemplate;
import org.springframework.data.redis.serializer.GenericJackson2JsonRedisSerializer;
import org.springframework.data.redis.serializer.Jackson2JsonRedisSerializer;
import org.springframework.data.redis.serializer.JdkSerializationRedisSerializer;
import org.springframework.data.redis.serializer.StringRedisSerializer;

import javax.annotation.Resource;


@Configuration
public class RedisConfig extends CachingConfigurerSupport {

    @Bean
    @Resource
    public RedisTemplate<String,Object> redisTemplate(RedisConnectionFactory redisConnectionFactory){
        //创建RedisTemplate对象
        RedisTemplate<String,Object> redisTemplate = new RedisTemplate<String,Object>();
        //设置连接工厂
        redisTemplate.setConnectionFactory(redisConnectionFactory);
        //序列化对象
        //简单的字符串序列化
//        StringRedisSerializer stringRedisSerializer = new StringRedisSerializer();
        //jdk序列化
//        JdkSerializationRedisSerializer jdkSerializationRedisSerializer = new JdkSerializationRedisSerializer();
        //Json序列化
        Jackson2JsonRedisSerializer Jackson2JsonRedisSerializer  = new Jackson2JsonRedisSerializer (Object.class);
        //设置String键的序列化方式
//        redisTemplate.setKeySerializer(stringRedisSerializer);
        //设置String值的序列化方式
        redisTemplate.setValueSerializer(Jackson2JsonRedisSerializer);
        redisTemplate.setKeySerializer(new StringRedisSerializer());
        return redisTemplate;
    }
}